

Introduction
Full remodels get the attention, but most homeowners are not gutting kitchens, moving plumbing, or rebuilding bathrooms from scratch. They are changing one thing at a time: a vanity, a backsplash, a light fixture, a row of cabinet hardware.
That is the logic behind a micro-renovation.
Micro-renovation, in one sentence:
A micro-renovation is a small, focused upgrade that improves one high-impact part of a room without remodeling the whole space.
Instead of spending tens of thousands of dollars redoing an entire room, a micro-renovation focuses on the single upgrade most likely to improve how the space looks, feels, or functions. Done well, it can make a room feel more current, more intentional, and easier to live with — without the cost, mess, or downtime of a full remodel.
If you want to upgrade a bathroom, kitchen, or living space without a full remodel, a micro-renovation can be one of the smartest ways to do it on a smaller budget.
The term does not have a formal industry definition, but it reflects a real shift in how many homeowners are approaching improvement projects. As labor and material costs have risen, smaller and more targeted upgrades have become a more practical alternative to full-room remodels.
This guide explains what a micro-renovation is, what it is not, how much it typically costs, which projects are actually worth doing, and where homeowners most often waste money trying to make a small upgrade do too much.
Table of Contents
- What Is a Micro-Renovation?
- What a Micro-Renovation Is Not
- How to Know If a Room Is a Good Candidate
- How Micro-Renovation Works
- Real-World Micro-Renovation Examples
- Top 12 Micro-Renovation Ideas for 2026
- How Much Does a Micro-Renovation Cost?
- Where Costs Rise Fast
- Best Projects by Budget: $300 / $500 / $1,000
- The Best Rooms to Start With
- Micro-Renovation vs. Full Remodel
- Pros and Cons
- DIY vs. Hiring a Pro
- Micro-Renovation Mistakes to Avoid
- Frequently Asked Questions
1. What Is a Micro-Renovation?
A micro-renovation is a small, targeted home improvement that focuses on one specific element or zone in a room rather than renovating the entire space.
Instead of tearing out a whole bathroom, you replace the vanity and mirror. Instead of a full kitchen remodel, you update the hardware, lighting, or backsplash. The change is smaller in scope, but if you target the right feature, the room can feel significantly better.
In plain English: you are not renovating the room — you are renovating the part of the room that is making everything else feel dated.
A practical working definition is this: a micro-renovation is a focused cosmetic or light-functional upgrade that usually costs between $100 and $3,000, takes one to two days, and avoids structural changes.
You will not find one official industry definition for the term. Designers, contractors, and homeowners use it loosely, but they usually mean the same thing: a small upgrade with a disproportionate visual or functional payoff.
2. What a Micro-Renovation Is Not
A micro-renovation is not a full room redesign. It is not a substitute for repairing water damage, mold, rot, failing plumbing, or outdated electrical work. It is also not always the cheapest option if poor materials force you to redo the job later.
It helps to be clear about the limits:
- It does not solve structural problems.
- It does not fix a room with a fundamentally bad layout.
- It does not automatically increase home value in every market.
- It does not work well when the visible issue is only a symptom of a larger repair problem.
Micro-renovations work best when the room is fundamentally sound and the main problem is cosmetic, dated, or highly visible.
3. How to Know If a Room Is a Good Candidate
Not every room is a good fit for a micro-renovation. The best candidates usually have four things in common:
The room works well functionally
The layout is fine. The plumbing works. The lighting setup is usable. You are not fighting the room every day.
The problem is visible and isolated
One element is dragging the room down: the vanity, the hardware, the mirror, the grout, the backsplash, or the lighting.
The surrounding surfaces are in decent condition
A new upgrade works best when it is not surrounded by severe damage, warped materials, or neglected finishes.
One change would affect the rest of the room visually
The best micro-renovations have a multiplier effect. A new backsplash changes how the countertops and cabinets read. A better light fixture improves the entire room after dark.
If those conditions are not present, you may need a more substantial renovation instead of a cosmetic upgrade.
4. How Micro-Renovation Works
The logic behind micro-renovation is simple: most rooms have one element that is dragging everything else down. Fix that one thing, and the room reads differently.
A useful exercise is to photograph the room first. Looking at a photo often makes the weak point more obvious than looking at the room in person.
Step 1: Find the weak link
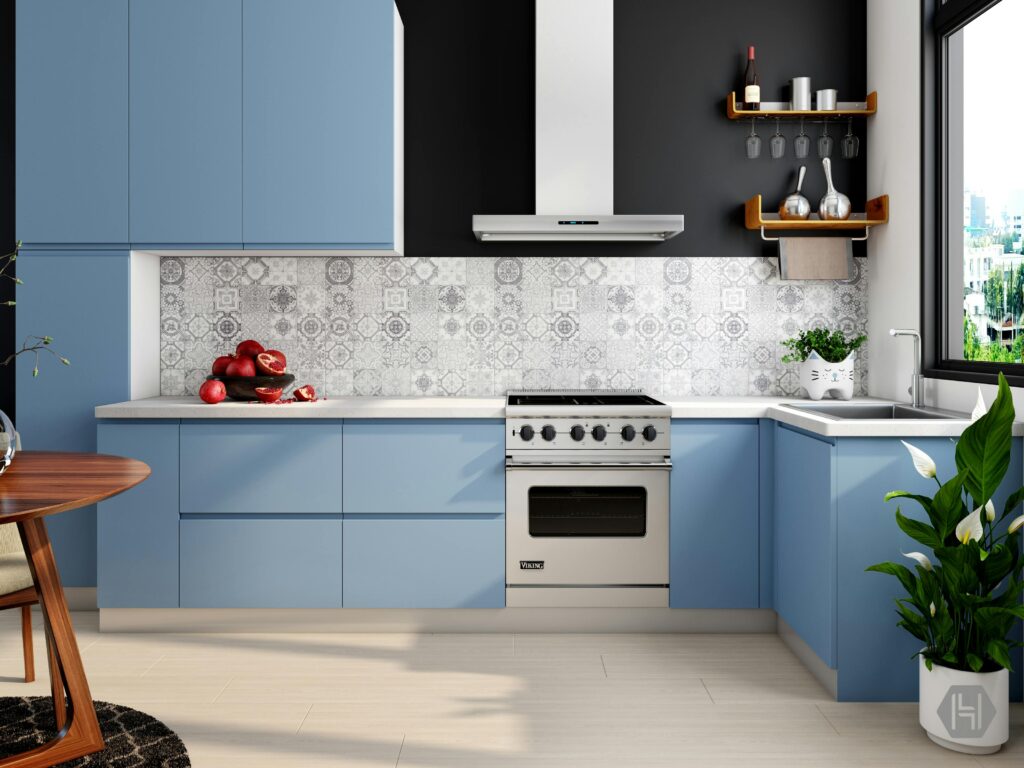
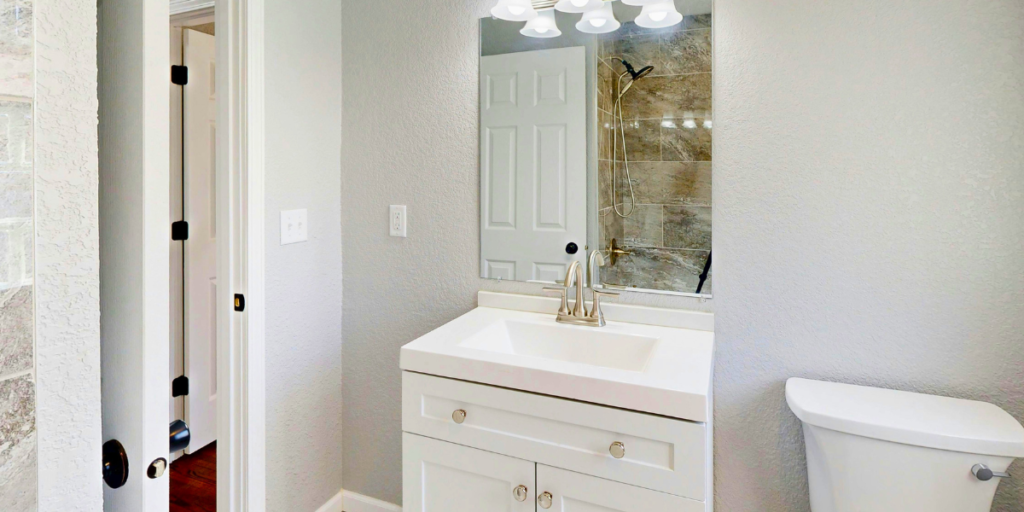
In kitchens, it is often outdated hardware, poor lighting, a tired backsplash, or cheap-looking countertops. In bathrooms, it is usually the vanity, mirror, grout, or basic builder-grade light bar. In entryways and living areas, it is often flat walls, weak lighting, or a lack of architectural detail.
Step 2: Choose a change with a multiplier effect
The best upgrades interact with nearby finishes. A new light fixture changes the mood of the whole room. A better mirror improves the vanity wall. A good wall treatment adds depth to everything around it.
Step 3: Finish it completely
This is where many projects fail. New hardware but one missing pull. Fresh paint but old outlet covers. A new mirror with the same dated vanity light above it. Micro-renovations succeed because they feel finished.
One fully completed micro-renovation is more valuable than three half-done upgrades.
Micro-Renovation Checklist
Before starting, ask yourself:
- Is the problem cosmetic rather than structural?
- Am I improving the real weak point or just decorating around it?
- Will this change still look good next year?
- Can I fully finish this project this weekend?
- Do I need a permit, electrician, or plumber?
- Will the new upgrade make surrounding damage more obvious?
If the answers are mostly yes, the room is probably a good micro-renovation candidate.
5. Real-World Micro-Renovation Examples
These are realistic examples, not best-case scenarios.
Kitchen Examples
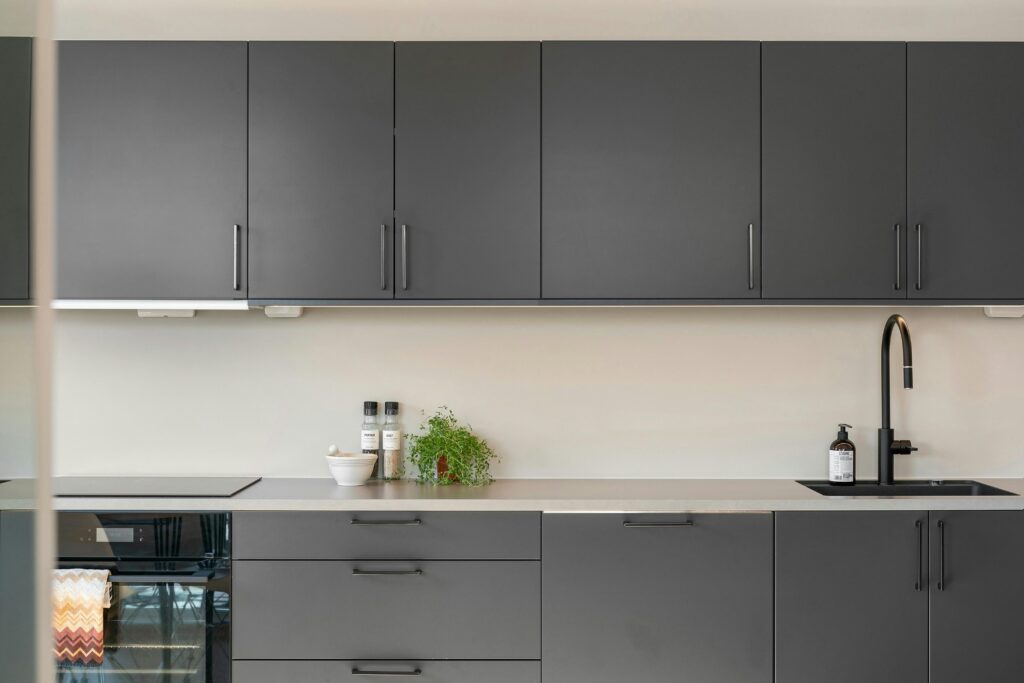
Cabinet hardware replacement ($90–$220 total)
Updating old cabinet pulls with matte black, brushed brass, or satin nickel can make cabinets look more current and intentional.
Best when: cabinet fronts are in good condition and the existing hole spacing works with new hardware.
Skip it if: the cabinet doors are warped, chipped, or visibly damaged. New hardware can make those flaws stand out more.
Peel-and-stick backsplash ($150–$350)
On smooth, clean walls, peel-and-stick backsplash can deliver a strong visual upgrade for a relatively low cost.
Best when: the wall is flat, dry, and properly cleaned before installation.
Skip it if: the surface is uneven, greasy, or exposed to direct high heat for long periods.
Open shelving in place of upper cabinet doors ($100–$300)
Removing selected cabinet doors and installing one or two floating shelves can create a lighter, more open kitchen look.
Best when: the items on the shelves will stay organized and the kitchen gets decent natural light.
Skip it if: you need concealed storage or do not want to manage dust and grease buildup.
Two-tone island ($40–$80)
Painting an island in a contrasting color is one of the cheapest ways to create a focal point in a kitchen.
Best when: the island is structurally sound and you are willing to do the prep properly.
Skip it if: you want a no-maintenance project. Poor prep leads to visible chips fast.
Bathroom Examples
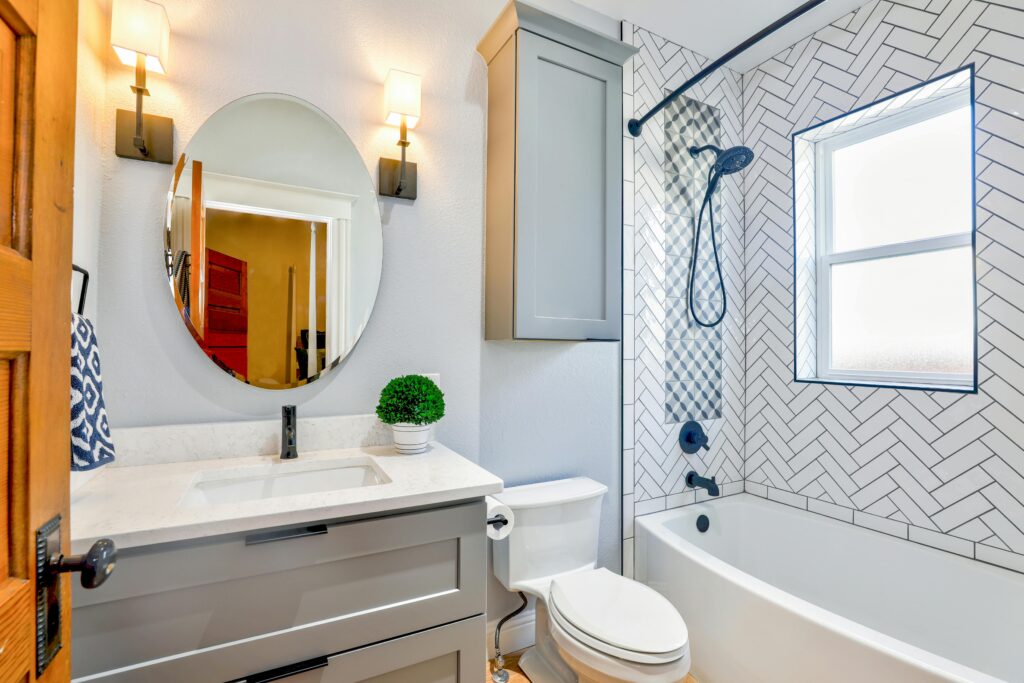
Vanity replacement ($400–$900 DIY, $900–$1,800 with a plumber)
Replacing a builder-grade vanity can dramatically improve the feel of a bathroom.
Best when: the new vanity fits the existing plumbing alignment and the floor beneath the old vanity is in good condition.
Skip it if: plumbing needs to be relocated or the wall and floor condition is unknown.
Grout and caulk refresh ($60–$120)
This is one of the most underrated bathroom upgrades available. Replacing stained grout and cracked caulk can make the room look cleaner and newer almost immediately.
Best when: the tile is sound and the issue is mostly discoloration or age.
Skip it if: there are signs of hidden water intrusion, soft subflooring, or failing tile adhesion.
Mirror upgrade ($80–$300)
A framed, arched, or backlit mirror can change the entire vanity wall with minimal work.
Best when: the new mirror size fits the vanity and wall proportions.
Skip it if: you have very limited wall width or the new mirror would crowd adjacent fixtures.
Vanity light fixture replacement ($70–$200)
Replacing a basic builder vanity fixture can modernize the room quickly.
Best when: you are comfortable with basic electrical work or hiring an electrician.
Skip it if: the electrical box placement is wrong for the new fixture or the wiring needs updating.
Living Room and Entryway Examples

Limewash or texture paint accent wall ($50–$100)
This can add depth and softness in a way that standard flat paint sometimes cannot.
Best when: the wall gets natural light and the room needs texture more than another color.
Skip it if: the wall surface is damaged or patched poorly.
Peel-and-stick wainscoting panels ($150–$350)
These can add architectural detail to flat walls, especially in entryways and dining areas.
Best when: the surface is smooth and you plan to paint the finished installation.
Skip it if: the brand quality is poor or the wall has major unevenness.
Interior door hardware upgrade ($200–$500 for a full home)
Swapping mismatched or dated handles throughout a house creates a more cohesive feel.
Best when: you want a whole-home polish upgrade without major construction.
Skip it if: the doors themselves are damaged or misaligned. New hardware will not solve that.
6. Top 12 Micro-Renovation Ideas for 2026
The projects below are not all new, but they reflect how many homeowners are upgrading in 2026: smaller budgets, shorter timelines, and a stronger focus on visible improvements rather than full-room overhauls.
Best for Kitchens
1. Replace cabinet hardware | $50–$220
The easiest entry point into micro-renovation and one of the most reliable visual upgrades.
2. Peel-and-stick backsplash | $100–$350
A good option for fast cosmetic change, especially in kitchens that need pattern or contrast.
3. Paint a kitchen island | $40–$80
Adds a focal point with very little material cost.
4. Add or restyle open shelving | $100–$350
Works well when you want a lighter kitchen look without changing the full cabinet layout.
Best for Bathrooms
5. Replace the bathroom vanity | $400–$900 DIY
One of the most dramatic bathroom upgrades on this list.
6. Refresh grout and caulk | $60–$120
A high-impact, low-cost fix that often makes a room look cleaner and more maintained.
7. Replace the bathroom mirror | $80–$300
A quick visual improvement with little installation complexity.
8. Upgrade the vanity light fixture | $70–$200
Improves both style and perceived brightness.
Best for Living Areas

9. Paint an accent wall | $40–$120
A simple way to create focus and depth.
10. Install peel-and-stick or MDF wainscoting | $150–$500
Adds architectural character where flat walls feel generic.
11. Replace interior door hardware throughout the home | $200–$500
A subtle but surprisingly effective upgrade.
Best Practical Upgrade
12. Install a smart thermostat | $120–$280
Useful, visible, and often DIY-friendly. A practical micro-renovation with everyday benefits.
7. How Much Does a Micro-Renovation Cost?
Cost ranges vary by region, material quality, and whether the work is DIY or professionally installed. Use the numbers below as planning estimates, not fixed prices.

| Project | DIY Cost | With Pro | Time | Permit? |
|---|---|---|---|---|
| Cabinet hardware | $50–$220 | $180–$450 | 2–4 hrs | No |
| Peel-and-stick backsplash | $100–$350 | $250–$600 | 3–6 hrs | No |
| Light fixture (hardwired) | $70–$300 | $180–$500 | 1–3 hrs | Usually no* |
| Bathroom vanity swap | $400–$900 | $900–$1,800 | Full day | Usually no |
| Accent wall (paint) | $40–$120 | $180–$420 | 4–6 hrs | No |
| Wainscoting panels | $150–$500 | $500–$1,100 | 1–2 days | No |
| Smart thermostat | $120–$280 | $250–$480 | 1–2 hrs | No |
| Open shelving | $80–$350 | $280–$750 | 3–6 hrs | No |
| Grout and caulk refresh | $60–$120 | $200–$450 | 3–5 hrs | No |
| Bathroom mirror | $80–$300 | $150–$350 | 1–2 hrs | No |
*Electrical code requirements vary by city and county. Check locally if you are unsure.
These ranges make most micro-renovations more approachable than full remodels, but high-cost metro areas can push totals upward quickly.
8. Where Costs Rise Fast
This is where many homeowners underestimate the budget.
Plumbing adjustments
A vanity replacement is affordable until the new unit no longer aligns with the existing plumbing.
Electrical changes
Swapping a fixture is one thing. Moving junction boxes, adding new switches, or correcting old wiring is another.
Surface prep and wall repair
Peel-and-stick products and paint look best on clean, flat surfaces. If the substrate is damaged, prep becomes the real project.
Material quality
Cheap products are often the fastest route to a cheap-looking result. When the project is small, it usually makes more sense to buy better materials.
9. Best Projects by Budget
Under $300

At this level, the best options are simple hardware, paint, and finish refreshes.
- Cabinet hardware replacement: $50–$220
- Grout and caulk refresh: $60–$120
- Bathroom mirror swap: $80–$200
- Accent wall: $40–$120
- Smart thermostat (DIY): $120–$200
Best value pick: grout and caulk refresh.
It is inexpensive, visible, and often makes an older bathroom look noticeably cleaner.
Under $500
This is where many of the best weekend projects live.
- Peel-and-stick backsplash + new hardware: about $300–$450 combined
- New light fixture + mirror: about $200–$450 combined
- Floating shelf installation: $150–$350
- Wainscoting panels in a small area: $150–$400
Best value pick: backsplash plus hardware.
When done well, this combination can update a kitchen more than many people expect.
Under $1,000
At this level, you can do one meaningful kitchen or bathroom improvement properly.
- Bathroom vanity swap (DIY): $400–$900
- Kitchen hardware + backsplash + light fixture: $400–$800 combined
- Wainscoting + paint in an entryway or dining room: $300–$700
- Interior door hardware throughout a small home: $400–$700
Best value pick: bathroom vanity replacement, if the plumbing aligns.
It is one of the strongest before-and-after upgrades on this list.
10. The Best Rooms to Start With
If you are unsure where to begin, these rooms usually offer the strongest return in visible impact.
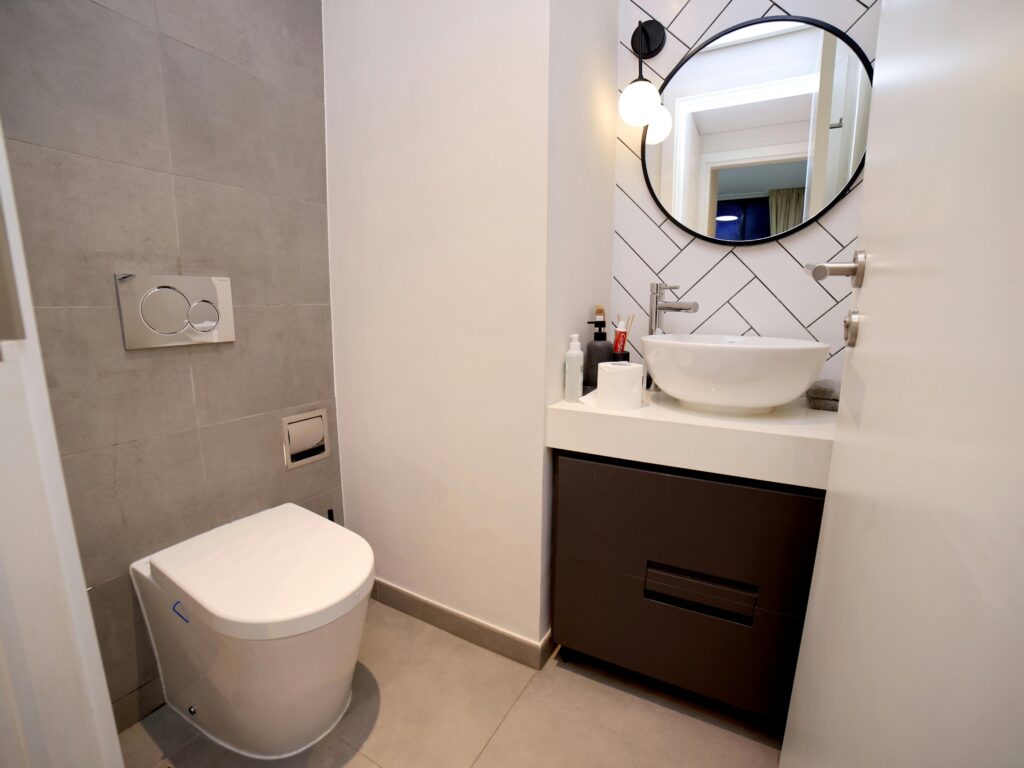
1. Bathroom
Bathrooms are small, highly visible, and often transformed by one or two changes.
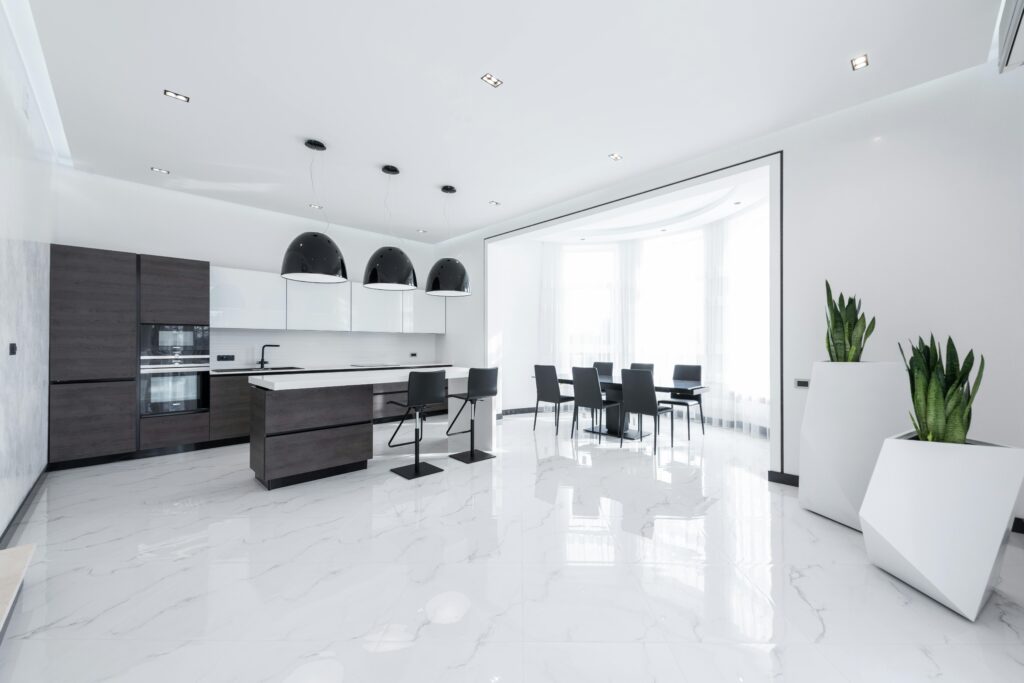
2. Kitchen
Hardware, lighting, and backsplash upgrades can shift the feel of a kitchen quickly.
3. Entryway
The entry sets the tone for the home. Even a small improvement here changes first impressions.
4. Bedroom
Lighting, wall treatment, and hardware upgrades can make a bedroom feel calmer and more finished.
5. Living Room
A good choice for style improvements, though often weaker than kitchens and bathrooms for practical resale impact.
11. Micro-Renovation vs. Full Remodel
| Factor | Micro-Renovation | Full Remodel |
|---|---|---|
| Typical cost | $100–$3,000 | $15,000–$75,000+ |
| Timeline | 1–2 days | Weeks to months |
| Permits | Rarely needed | Usually required |
| Contractor | Often optional | Typically required |
| Daily disruption | Minimal | Significant |
| Structural issues solved? | No | Yes |
| Best for | Cosmetic refresh, staging, rentals | Layout changes, system upgrades, structural problems |
A micro-renovation is the right choice when the room’s bones are fine and the problem is mostly visual.
It is the wrong choice when the room is fighting you functionally every day.
If there is water damage, mold, a bad floor plan, failing systems, or chronic layout frustration, a cosmetic upgrade will not solve the real issue.
12. Pros and Cons
Pros
- Affordable enough to do without financing in many cases
- Fast enough to complete over a weekend
- Minimal disruption to daily life
- Often reversible
- Useful for pre-sale improvement and staging
- Accessible for renters with approval
- Easier to manage than full-room projects
Cons
- Does not solve structural or layout problems
- Can look unfinished if details are skipped
- Poor-quality materials lead to poor-looking results
- Some projects still need a plumber or electrician
- New upgrades can make older surrounding finishes look worse
- Bad project selection can waste money quickly
13. DIY vs. Hiring a Professional
Many micro-renovations are DIY-friendly, but not all of them belong in casual DIY territory.
Good DIY candidates
- Cabinet hardware replacement
- Peel-and-stick backsplash on clean, flat walls
- Painting walls, trim, and ceilings
- Floating shelf installation
- Smart thermostat installation
- Grout and caulk refresh
- Mirror replacement
- Contact paper application
DIY with caution
- Hardwired light fixture replacement
- Bathroom vanity swap
- Tile-related work on uneven walls
- Any project requiring precision drilling into tile or masonry
Hire a professional
- Plumbing line relocation
- New electrical circuits or panel work
- Structural modifications
- Projects where a mistake could cause leaks, code issues, or major wall damage
Simple rule: if a mistake could create a leak, an electrical problem, or a damaged finish that is expensive to repair, it is no longer a casual DIY project.
14. Micro-Renovation Mistakes to Avoid
This is where many projects go wrong.
1. Doing cosmetic upgrades when the room actually needs repairs
If there is rot, mold, active leaks, or failing surfaces, address those first.
2. Choosing the wrong target
Do not pick the easiest upgrade just because it is easy. Pick the one actually hurting the room.
3. Buying poor-quality materials
Cheap peel-and-stick tile, weak hardware, or thin contact paper can make the room look worse, not better.
4. Leaving the job 80% finished
One missing pull, one unfinished edge, one visible gap — these are the details people notice.
5. Ignoring surrounding finishes
A beautiful new fixture can make yellowed grout, rusty hinges, or damaged paint look worse by contrast.
6. Choosing very trendy permanent finishes
Trendy is fine for removable products. For permanent changes, choose something you can live with for years.
7. Underestimating vanity swaps
A vanity replacement looks simple until plumbing, measurements, anchoring, and wall condition complicate the project.
15. Frequently Asked Questions
What is a micro-renovation?
A micro-renovation is a small, focused home improvement that targets one feature or zone in a room instead of renovating the whole space. Most projects cost under $3,000 and can be completed in one to two days.
How is a micro-renovation different from a minor renovation?
A minor renovation often involves multiple elements in a room and may include more invasive work. A micro-renovation is more focused: one area, one feature, done properly.
Do micro-renovations increase home value?
They can improve buyer perception and marketability, especially in kitchens and bathrooms, but the return varies by market, project type, and execution quality. They are best viewed as targeted improvements, not guaranteed ROI formulas.
Is a micro-renovation worth it before selling?
Often yes — especially when the home is structurally sound but cosmetically dated. Small upgrades can improve first impressions and buyer confidence, but they will not compensate for major repair issues.
Can renters do micro-renovations?
Yes, if the upgrades are reversible and permitted by the lease. Peel-and-stick backsplash, removable wallpaper, plug-in lighting, and temporary wall treatments are common renter-friendly options.
What is the best first micro-renovation for beginners?
For most homeowners, cabinet hardware replacement, paint, grout refresh, or a mirror swap are the safest first projects. They are inexpensive, visible, and low-risk.
What is the cheapest micro-renovation with the most visual impact?
Refreshing grout and caulk, replacing cabinet hardware, and painting an accent wall are usually among the most affordable high-impact options.
How long does a micro-renovation take?
Most projects take a few hours to two days, depending on complexity.
Do micro-renovations require permits?
Usually not for cosmetic work. Painting, mirrors, hardware, and most adhesive products do not require permits. Electrical and plumbing changes may, depending on local code.
When is a micro-renovation not enough?
When the real problem is structural, systemic, or layout-based. If the room has water damage, electrical issues, poor workflow, or failing materials, you likely need more than a cosmetic upgrade.
Final Thoughts

Micro-renovation works when you approach it honestly: identify the real problem, choose the right fix, buy decent materials, and finish the project completely.
It does not work as a substitute for necessary repairs, and it will not rescue a room with a fundamentally bad layout. But for homes that are structurally sound and cosmetically tired, it is one of the most practical upgrade strategies available.
If you are not sure where to start, begin with the room that annoys you most in daily life — not the one you think should look the most impressive online.
In most homes, the best micro-renovation is not the trendiest project. It is the one that fixes the most visible weakness properly.
Next step: make a shortlist of three possible upgrades, price them honestly, and choose the one you can fully finish this weekend.